Monday, February 28, 2022

Root Beer Cake with Chocolate Root Beer Ganache


Taken from King Arthur Baking / Carla Hall

PREP: 30 mins / BAKE: 50 to 55 mins / TOTAL: 1 hr 45 mins

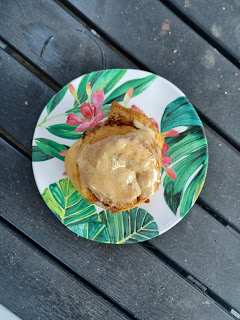
YIELD: one 10" Bundt cake


Ingredients

CAKE

  • 2 1/4 cups (270g) King Arthur Unbleached All-Purpose Flour
  • 1 1/2 cups (298g) granulated sugar
  • 1/2 cup (106g) light brown sugar or dark brown sugar, packed
  • 1 teaspoon baking soda
  • 1/2 teaspoon salt
  • 1 teaspoon cinnamon*
  • 1 teaspoon nutmeg
  • 1 teaspoon star anise, ground
  • 1 1/2 cups (340g) root beer, flat or fizzy
  • 16 tablespoons (227g) unsalted butter, room temperature
  • 1/4 cup (21g) unsweetened cocoa, Dutch-process or natural
  • 2 large eggs, at room temperature
  • 1/2 cup (113g) buttermilk, at room temperature
  • 1 teaspoon vanilla extract
  • 1 teaspoon fresh ginger, grated fresh
  • *The original recipe calls for smoked cinnamon; if you can find it, by all means use it.

GANACHE

  • 1/4 cup (57g) root beer, flat or fizzy
  • 4 tablespoons (57g) unsalted butter, room temperature
  • 1 1/2 tablespoons unsweetened cocoa, Dutch-process or natural
  • 2 cups (227g) confectioners' sugar
  • 1/8 teaspoon nutmeg
  • 1/8 teaspoon star anise, ground
  • 1/4 teaspoon salt

Preheat the oven to 350°F. Grease a 10-cup Bundt pan, a 9" x 13" pan, or two 9" round cake pans.

To make the cake: In a large bowl, whisk together the flour, sugars, baking soda, salt, and spices. In a medium saucepan, bring the root beer, butter, and cocoa powder to a boil, stirring occasionally. Remove from the heat, cool for 5 minutes, then mix into the flour mixture.

In a small bowl, whisk together the eggs, buttermilk, and vanilla and stir into the flour mixture. Fold in the grated ginger.

Transfer the batter to the prepared pan(s) and bake for 50 minutes for a Bundt cake, 35 minutes for a 9" x 13" cake, or 33 to 35 minutes for 9" layers, until the edge of the cake begins to pull away from the pan and a toothpick inserted in the center comes out clean.

Remove the cake from the oven. Gently loosen it from the pan around the edge, if you can. Place a cooling rack on top, across the surface of the cake. Very carefully turn the cake and rack over so that the cake (in its pan) is resting on the rack. Wait 15 minutes, then carefully lift the pan off the cake, jiggling it gently first to make sure it's not stuck.

To make the ganache: In a small saucepan, bring the root beer to a boil over medium heat. Add the butter and cocoa powder, stirring until smooth. Pour the mixture into a large bowl, then whisk in the confectioners' sugar, spices, and salt until smooth and glossy. Pour over the top of the cake while still warm.

Storage information: Store any leftover cake, well wrapped in plastic, at room temperature for several days; freeze for longer storage.

My Notes: This was a great cake. Super soft--like eating a chocolate pillow. I used diet root beer and the cake was still plenty sweet. I also ran out of root beer so used ginger beer for the ganache. And no ground anise. I put a whole pod in the boiling root beer mixture. Cooked 50 minutes, cooled 15. MXF

Monday, January 31, 2022

Sichuan Chicken Salad


From Milk Street

Ingredients

  • 2 10-12-ounce bone-in, skin-on split chicken breasts
  • 6 scallions, white parts coarsely chopped, green parts thinly sliced on a bias, reserved separately
  • 1 1-inch piece fresh ginger, cut into 4 pieces and smashed
  • 2 large garlic cloves, peeled and smashed
  • Kosher salt
  • 1/4 cup dry sherry (optional)
  • 2 tablespoons chili oil
  • 2 tablespoons tahini
  • 1½ tablespoons white sugar
  • 1½ tablespoons toasted sesame oil
  • 1 tablespoon soy sauce
  • 2 tablespoons unseasoned rice vinegar
  • 1 teaspoon Sichuan peppercorns (optional), toasted and finely ground
  • ⅛-¼ teaspoon cayenne pepper
  • 1 large English cucumber, halved lengthwise, seeded and thinly sliced crosswise on a bias
DIRECTIONS
In a large saucepan, place the chicken skin side down, then add the scallion whites, ginger, garlic and ¾ teaspoons salt. Add 4 cups water and the sherry, if using, fully submerging the chicken. Bring to a boil over medium-high, then cover, reduce to low and cook at a bare simmer until the thickest part of the chicken registers 160°F, 20 to 25 minutes. Uncover the pan and let the chicken cool in the liquid for 15 minutes.

Meanwhile, in a small bowl, whisk together the chili oil, tahini, sugar, sesame oil, soy sauce, vinegar, ¾ teaspoons of salt, Sichuan peppercorns, if using, and cayenne.

Using tongs, remove the chicken from the cooking liquid. Remove and discard the skin and bones, then transfer the meat to a large bowl. Add 2 tablespoons of the tahini dressing, then use a wooden spoon to smash the meat, shredding it and working in the dressing. Use your fingers to pull the shreds into bite-size pieces.

Add the cucumber and ¾ each of the peanuts and scallion greens. Drizzle with the remaining dressing and toss until evenly coated. Transfer to a serving bowl and sprinkle with the remaining peanuts and scallions.

Tip: Don’t boil the chicken; keep the liquid at a bare simmer so the meat stays moist and tender.

My Notes: I used rotisserie chicken to make this super simple. It would be better to shred rather than cut into chunks . The dressing is so very good. MXF


Monday, January 10, 2022

Cacio e Pepe Scones


Adapted from King Arthur Baking


PREP: 10 mins / BAKE: 18 to 23 mins / TOTAL: 58 mins
YIELD: 12 scones
 
Ingredients
Dough
  • 2 3/4 cups (330g) King Arthur Unbleached All-Purpose Flour
  • 2 tablespoons (25g) granulated sugar
  • 3/4 teaspoon salt
  • 1.5-2 tablespoons coarsely ground black pepper
  • 1 tablespoon baking powder
  • 8 tablespoons (113g) butter, cold
  • 1 1/2 cups (150g) Parmesan cheese or Pecorino Romano cheese, grated
  • 2 large eggs
  • 1/2 to 2/3 cup (113g to 152g) milk (start with smaller amount, add more as needed)
Topping
  • milk, for brushing
  • 1/4 to 1/3 cup (25g to 33g) Parmesan cheese or Pecorino Romano cheese, for sprinkling on top
  • coarsely ground black pepper, to taste (optional)

Instructions
To make the dough: In a large bowl, whisk together the flour, sugar, salt, pepper, and baking powder.

Work in the butter just until the mixture is unevenly crumbly; it's OK for some larger chunks of butter to remain unincorporated.

Add the grated cheese and mix until evenly combined.

In a separate bowl, whisk together the eggs and milk.  

Add the liquid ingredients to the dry ingredients. Using a bowl scraper or a large spoon, stir until everything is moistened and holds together. If the mixture seems dry, drizzle in additional milk about a teaspoon at a time until the dough comes together.

Line a baking sheet with parchment; if you don't have parchment, just use the pan without greasing it. Sprinkle a bit of flour atop the parchment or pan.

To shape the scones: Scoop the dough by the 1/4-cupful onto the baking sheet. (A scone scoop is helpful here.)

Brush the tops of the scones with milk and sprinkle with additional cheese and a bit of black pepper, if desired.

For best texture and highest rise, place the pan of scones in the freezer for 30 minutes, uncovered. Chilling the scones relaxes the gluten in the flour, making the scones more tender and allowing them to rise higher. It also chills the fat, which makes the scones a bit flakier. While the scones are chilling, preheat the oven to 425°F with a rack in the upper third.

To bake the scones: Bake the scones in the upper part of the oven for 18 to 20 minutes, or until they're a light golden brown.

Remove the scones from the oven and cool briefly on the pan. Serve warm; they're delicious as is and extra-tasty with a pat of salted butter on top.

Storage information: When the scones are completely cool, wrap and store them at room temperature for up to several days. To reheat room-temperature scones, place them on a baking sheet, tent lightly with foil, and warm in a preheated 350°F oven for about 10 minutes.

Tips from our Bakers
Why the range in milk? Flour is like a sponge; it absorbs liquid during humid weather, and dries out in dry weather. In summer or when it's hot and humid, use the lesser amount of milk in this recipe; during winter, or when it's very dry, use the greater amount. Either way, start with the smaller amount, and drizzle it in until the dough is the correct consistency.

Want to make scones well ahead of time? Simple. After the unbaked scones' 30 minutes in the freezer (or whenever they're frozen solid), place them in a zip-top plastic bag. Return to the freezer, and store for up to a month. Bake as directed (without thawing), adding a couple of extra minutes in the oven if needed.

My Notes: What is the difference between a scone and a biscuit? A philosophical question perhaps, but these seem like drop biscuits to me. They are really good. I used probably 1.5 tbsp of pepper and that seems like the right amount. I contemplated sprinkling sechuan peppercorns on the top but chickened out. My only complain is that these are rather sticky. Maybe I added too much milk.

MXF

Monday, January 3, 2022

Perfect Pillowy Cinnamon Rolls


From King Arthur Baking: https://www.kingarthurbaking.com/recipes/perfectly-pillowy-cinnamon-rolls-recipe 

PREP: 30 mins
BAKE: 15 to 18 mins
TOTAL: 2 hrs 50 mins
YIELD: 8 large rolls

Ingredients

Tangzhong
  • 1/2 cup (113g) milk, whole preferred
  • 3 tablespoons (24g) King Arthur Unbleached Bread Flour
Dough
  • 2/3 cup (151g) milk, cold, whole preferred
  • 2 1/2 cups (300g) King Arthur Unbleached Bread Flour
  • 1 teaspoon (6g) salt
  • 2 tablespoons (25g) granulated sugar
  • 2 teaspoons instant yeast
  • 4 tablespoons (57g) unsalted butter, softened
Filling
  • 1 tablespoon (14g) butter, melted
  • 1/2 cup (107g) light brown sugar, packed
  • 2 tablespoons (14g) King Arthur Unbleached Bread Flour
  • 3 to 4 teaspoons (8g to 10g) cinnamon*
  • 1/16 teaspoon (pinch) salt
  • *Use the lesser amount for stronger cinnamons, like Vietnamese (Saigon); the larger amount for milder cinnamons, like Indonesian/Ceylon.
Icing
  • 3 tablespoons (42g) butter, melted, divided
  • 1/2 teaspoon vanilla extract
  • 1/16 teaspoon (pinch) salt
  • 1 1/2 cups (170g) confectioners' sugar, sifted
  • 1 to 2 tablespoons (14g to 28g) milk, cream, or buttermilk; enough to thin to desired consistency

Instructions
To make the tangzhong: Combine both the ingredients in a small saucepan, and whisk until no lumps remain.

Place the saucepan over medium heat and cook the mixture, stirring regularly, until thickened, paste-like, and the spoon or spatula leaves lines on the bottom of the pan. This should take 1 to 3 minutes, depending on the strength of your burner.

Remove from the heat and transfer to a large mixing bowl, the bowl of a stand mixer, or the bucket of a bread machine (whatever you plan to knead the dough in).

To make the dough: Weigh your flour; or measure it by gently spooning it into a cup, then sweeping off any excess. Add the cold milk, then the flour and remaining ingredients to the mixing bowl in the order listed; the heat from the tangzhong will help to warm the cold milk.

Mix — by hand, on low speed of a stand mixer with the dough hook attachment, or in a bread machine set to the dough cycle — to bring the dough together. Next, knead the dough until it’s smooth, elastic, and tacky. This will take up to 15 minutes by hand, 10 to 12 minutes on medium-low speed of a mixer, or the length of the dough cycle in a bread machine.

Shape the dough into a ball, place it in a bowl, and cover the bowl with plastic wrap or a reusable cover.

Let the dough rise until puffy but not necessarily doubled in bulk, about 60 to 90 minutes (depending on the warmth of your kitchen).

To make the filling: While the dough is rising, put the melted butter into a medium bowl and add the remaining ingredients, stirring until the mixture is the texture of damp sand. Set aside.

Lightly grease a baking sheet, or line it with parchment paper. 

To assemble the rolls: Transfer the dough to a lightly greased work surface and press it into a 10” x 12” rectangle that’s about 1/2” thick. For evenly shaped rolls, try to pat the dough into an actual rectangle (with corners), rather than an oval. 

Sprinkle the filling over the dough, covering all but a 1/2” strip along one long side. 

Starting with the filling-covered long side, roll the dough into a log.

Score the dough lightly into eight equal 1 1/2” to 2” pieces; this will make large, saucer-sized cinnamon rolls — their generous size is part of their charm. Cut the dough at the score marks. Dental floss will give you the cleanest cut: pull off a long piece of floss, loop it underneath the log at the score mark, and pull the ends in opposite directions to cut the dough. Repeat until you've cut all of the rolls. If you don’t have dental floss, a bench knife or sharp knife will work. 

Place the rolls onto the prepared baking sheet, spacing them so there’s at least 2” between each one and they’re 2” away from the edges of the pan; a 3-2-3 arrangement works well. To prevent them from unraveling while they rise and bake, tuck the ends of the spirals underneath the rolls so that they’re held in place.

Cover the rolls with lightly greased plastic wrap or a reusable cover and let them rise for 30 to 60 minutes (depending on the warmth of your kitchen). The rolls should be puffy and the dough shouldn’t bounce back immediately when gently pressed.

About 20 minutes before you’re ready to bake, position a rack in the top third of the oven. Preheat the oven to 375°F.

Bake the rolls for 14 to 18 minutes, until they’re a light golden brown and a digital thermometer inserted into the center of one roll reads 190°F. Bake for the lesser amount of time for extra-soft rolls, and the longer amount of time for rolls with a bit more color and slightly firmer texture.

Remove the rolls from the oven, place the pan on a rack, and brush the hot rolls with 1 1/2 tablespoons (21g) of the melted butter. Let the rolls cool for 10 to 15 minutes before icing.

To make the icing: Combine the remaining 1 1/2 tablespoons (21g) melted butter with the remaining icing ingredients in a medium bowl, mixing with a spatula until smooth. Milk makes a lovely frosting; using cream in place of milk creates an extra layer of richness, while substituting buttermilk adds subtle tang, a nice counterpoint to the icing's overall sweetness.

Ice the rolls and serve immediately. If you’re planning to serve the rolls later, wait to ice them until just before serving. Store icing at room temperature, tightly covered, until you’re ready to use it.

Store completely cooled rolls, un-iced and well wrapped, for a couple of days at room temperature; or freeze for up to 1 month.

My Notes: These are very good and pretty straightforward. I added flora di silia to the frosting for a hint of citrus--I liked it, but D did not. I baked for 14 minutes, but 15-16 is probably better. My own photo.

MXF

Sunday, April 18, 2021

Braided Lemon Bread


Taken from King Arthur Baking

THIS MAKES TWO LOAVES!!!

Ingredients

Sponge

  • 3/4 cup (170g) water, lukewarm
  • 2 teaspoons sugar
  • 1 tablespoon instant yeast
  • 1/2 cup (57g) King Arthur Unbleached All-Purpose Flour

Dough

  • all of the sponge
  • 3/4 cup (170g) plain or vanilla yogurt, at room temperature
  • 8 tablespoons (113g) unsalted butter, softened
  • 2 large eggs, at room temperature, beaten
  • 1/2 cup (99g) granulated sugar
  • 2 teaspoons (12g) salt
  • 2 teaspoons vanilla extract
  • 5 cups (600g) King Arthur Unbleached All-Purpose Flour

Filling

  • 6 ounces (170g) cream cheese, softened
  • 1/4 cup (50g) sugar
  • 1/4 cup (57g) sour cream, at room temperature
  • 2 teaspoons fresh lemon juice
  • 1/4 cup (28g) King Arthur Unbleached All-Purpose Flour
  • 3/4 cup (203g) prepared lemon curd*

*See "tips," below.

Topping

  • 1 large egg beaten with 2 teaspoons water and a pinch of salt
  • pearl sugar or coarse sparkling sugar


Weigh your flour; or measure it by gently spooning it into a cup, then sweeping off any excess.

To make the sponge: In a large mixing bowl or the bowl of your stand mixer, stir together the sponge ingredients. Cover loosely with plastic wrap, and set aside to proof for 10 to 15 minutes.

To make the dough: In the same bowl, combine the sponge with the yogurt, butter, eggs, sugar, salt, and vanilla. Add 4 1/2 cups (540g) of the flour and mix with the paddle attachment until the dough is a rough, shaggy mass.

Switch to the dough hook and knead on speed 2 until a soft, smooth dough forms, about 5 to 6 minutes. Add more flour, if necessary, to achieve the correct consistency.

Place the kneaded dough in a lightly greased bowl, cover with plastic wrap, and allow it to rise until it's quite puffy and nearly doubled, about 60 to 90 minutes. While the dough is rising, prepare the filling.

To prepare the filling: Combine all the filling ingredients (except the lemon curd) in a small bowl, mixing until smooth and lump-free. Reserve the filling and lemon curd until ready to fill the braids.

Gently deflate the dough and divide it in half. Cover half with plastic wrap and set it aside as you roll the first piece into a 10" x 15" rectangle. Rolling on parchment paper makes moving the bread to the baking sheet much easier.

Lightly press two lines down the dough lengthwise, to visually divide it into three equal sections. Spread half the cream cheese filling down the center section and top with half the lemon curd, leaving 1" bare of filling at each end of the dough.  

To shape the braid: Begin by using your bench knife, a pair of scissors, or a sharp knife to cut and remove a 1” rectangle from each of the dough's four corners. This “notching” will make the ends of the finished braid neater.  

Next, fold the resulting dough "tab" over the edge of the filling on one end. Starting at that same end, cut 1" crosswise strips down the length of the outside sections, making sure you have the same number of strips on each side.

Beginning on the left, lift the top dough strip and gently bring it across the filling diagonally. Repeat on the other side with the top dough strip, so that the two strips crisscross each other. Continue down the entire braid, alternating strips to form the loaf. When there are just two strips remaining (one on each side), fold the remaining "tab" over the filling, then crisscross the final two strips. 

Repeat the rolling, filling, and braiding steps for the second piece of dough, using the remaining cream cheese filling and lemon curd. Set both loaves aside, lightly covered, to rise until quite puffy, 45 to 50 minutes.

Preheat the oven to 375°F. Brush the loaves with the beaten egg, and sprinkle with pearl sugar or coarse sparkling sugar.

To bake the braids: Uncover the braids and bake them for 25 to 30 minutes, or until they're golden brown. Remove them from the oven and cool for 15 to 20 minutes before serving.

Store any leftovers, well wrapped, in the refrigerator for a couple of days; freeze for longer storage. Reheat (or thaw and reheat) briefly before enjoying.

My Notes: I had to do the hard math to turn this into one loaf but it was very good. The braid is easy and looks impressive, but I had a little leakage on the sides so make sure the braids don't cut all the way to the filling. Also I added some passion fruit puree which was great but made the curd a bit runny. Would a 1/4 tsp of cornstarch help? MXF

Tuesday, March 9, 2021

Chicken Marbella


Adapted from Simply Recipes

PREP TIME 15 mins / COOK TIME 60 mins / MARINATING 3 hrs / TOTAL TIME 4 hrs 15 mins

SERVINGS 5 to 8 servings


  1. 2 chickens, 2 1/2 lbs each, quartered, bone-in, skin-on OR bone-in, skin-on chicken thighs (5-8 pieces)
  2. Cloves from 1/2 head of garlic, peeled and finely puréed
  3. 2 tablespoons dried oregano
  4. Coarse salt and freshly ground pepper to taste
  5. 1/4 cup red wine vinegar
  6. 1/4 cup extra virgin olive oil
  7. 1/2 cup pitted prunes
  8. 8 large pitted Spanish green olives, cut in half
  9. 1/4 cup capers with a bit of juice
  10. 3 bay leaves
  11. 1/4 cup brown sugar
  12. 1/2 cup white wine
  13. 2 tablespoons fresh Italian parsley, finely chopped


Marinate the chicken

In a large bowl combine garlic, oregano, salt and pepper to taste, vinegar, olive oil, prunes, olives, capers with caper juice, and bay leaves. Add the chicken pieces and coat completely with the marinade. Cover and let marinate, refrigerated, several hours or overnight.

Place chicken in baking pan, top with marinade, brown sugar, wine.

Preheat oven to 350°F. Arrange chicken in a single layer in one or two large, shallow baking pans and spoon marinade over it evenly. Sprinkle brown sugar over the chicken pieces and pour white wine around them.

Bake for 50 minutes to 1 hour, basting frequently with the pan juices. Chicken is done when a sharp knife inserted into the thigh pieces, at their thickest point, run with clear yellow juices (not pink).

With a slotted spoon, move the chicken, prunes, olives, and capers to a serving platter. Pour some of the pan juices over the chicken and sprinkle generously with parsley. Serve remaining juices in a gravy boat.

My Notes: This was so very good! A little greasy, even after skimming, so I might take off the chicken skin before baking next time. I also used dry vermouth instead of white wine. MXF

Tuesday, January 12, 2021

Banana Snacking Cake With Salted Caramel Glaze


From the New York Times

YIELD: 12 servings / TIME: 1 hour, plus cooling

FOR THE CAKE:

  • ½ cup/115 grams unsalted butter (1 stick), melted, plus more for pan
  • 1 ½ cups/185 grams all-purpose flour
  • ¼ cup/50 grams granulated sugar
  • ¾ teaspoon baking soda
  • ½ teaspoon fine salt
  • 1 cup/250 grams mashed banana (from 2 to 3 very ripe bananas)
  • ¼ cup/60 milliliters sour cream
  • 2 tablespoons dark brown sugar
  • 2 large eggs
  • 1 teaspoon vanilla extract
  • See notes for additional ingredients

FOR THE GLAZE:

  • 4 tablespoons/65 grams unsalted butter (1/2 stick), cut into pieces
  • ⅓ packed cup/70 grams dark brown sugar
  • ¼ cup/60 milliliters heavy cream
  •  Large pinch of fine sea salt
  • ¼ cup/30 grams confectioners’ sugar
  •  Flaky sea salt, for serving
Heat oven to 350 degrees. Grease a 9-by-9-inch pan, and then line with parchment paper, letting the two long ends hang over the edges by at least 2 inches.

In a large bowl, whisk together flour, granulated sugar, baking soda and salt. Whisk in bananas, melted butter, sour cream, brown sugar, eggs and vanilla.

Scrape into baking pan and smooth the top. Bake until the top springs back when lightly pressed in the center, and a toothpick inserted in the center comes out clean, about 25 minutes. Let cool completely.

When cake is cool, make the glaze: In a medium or large pot (not a small one because the mixture will bubble up), combine butter, brown sugar, heavy cream and salt. Bring to a full boil and continue to boil over medium heat for 1 minute. Remove from heat and let sit for 5 minutes.

Whisk in confectioners’ sugar until smooth, then immediately pour over cooled cake. Spread evenly across cake and let set for at least 30 minutes. Sprinkle with flaky sea salt before serving.

My Notes: Best version of banana cake ever. Super moist and fluffy and the glaze is the best. I think it could use some warm spices (cinnamon, nutmeg, cardamom) or maybe just a bit of rum in the glaze. MXF